
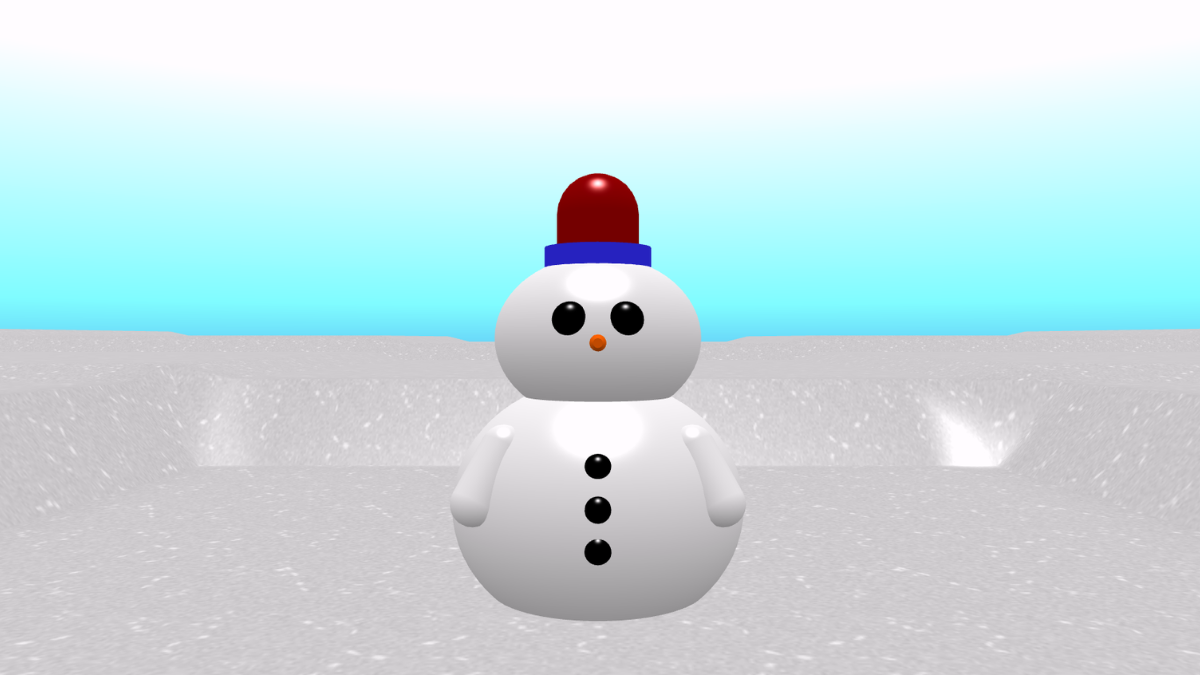
Build the snowman body
- From Events, add a ‘start’ block to the code area.
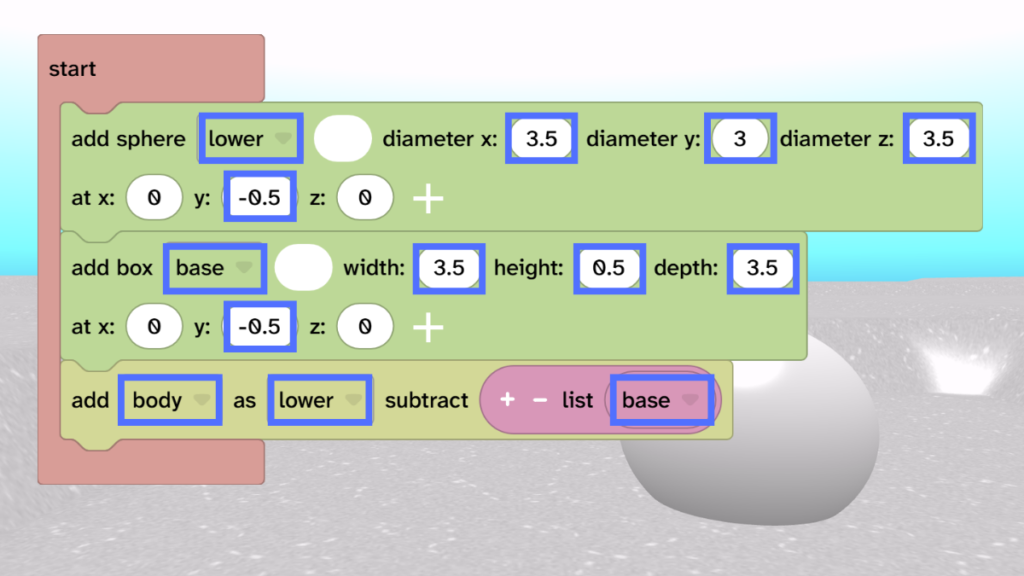
- From Scene, choose Objects and add an ‘add sphere’ block inside the ‘start’.
- Rename it to ‘lower’.
- Set the size to diameter x: 3.5, y: 3 and z: 3.5
- Set the y position to -0.5.
- From Scene, choose Objects and drag an ‘add box’ block underneath.
- Rename it to ‘base’.
- Change the settings to width: 3.5, height: 0.5, depth: 3.5 and y: -0.5.
- From Transform, choose Combine and drag the ‘add subtracted’ block under the box.
- Rename it to ‘body’ and choose as ‘lower’ subtract ‘base’.
- Press Play ▶️ to test. This creates a body with a squared off base.
Add the head
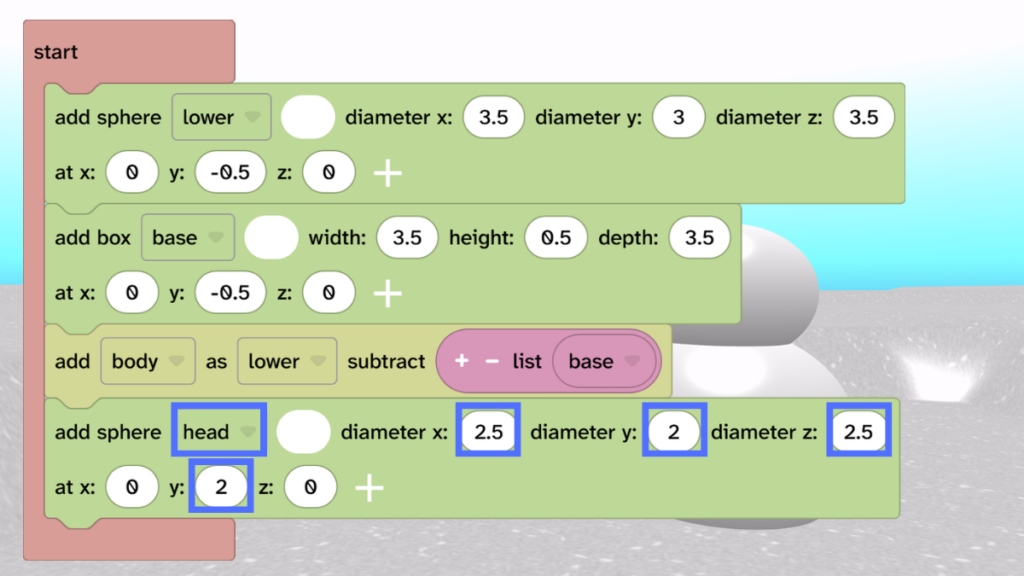
- Add another sphere called ‘head’.
- Change the settings to diameter x: 2.5, diameter y: 2, diameter z: 2.5 and y: 2.
Add eyes and a nose
- Add another sphere and name it ‘leftEye’.
- Change diameter x y and z: 0.4
- Change position x: -0.3, y: 3 and z: -1.1
- Duplicate the left eye and rename it to ‘rightEye’.
- Change the x position to 0.3.
- From Scene, choose Objects and add a cylinder.
- Rename it to ‘nose’ and choose a colour, such as orange.
- Change the settings height: 0.5, top: 0.1 and bottom: 0.2 and change y: 2.7 and z: -1.4.
- From Transform, choose the ‘rotate by‘ block. Make sure it is set to ‘nose’ and change the x to 270.
- Press Play ▶️ to test. Your eyes and nose should be in position.

Add the buttons
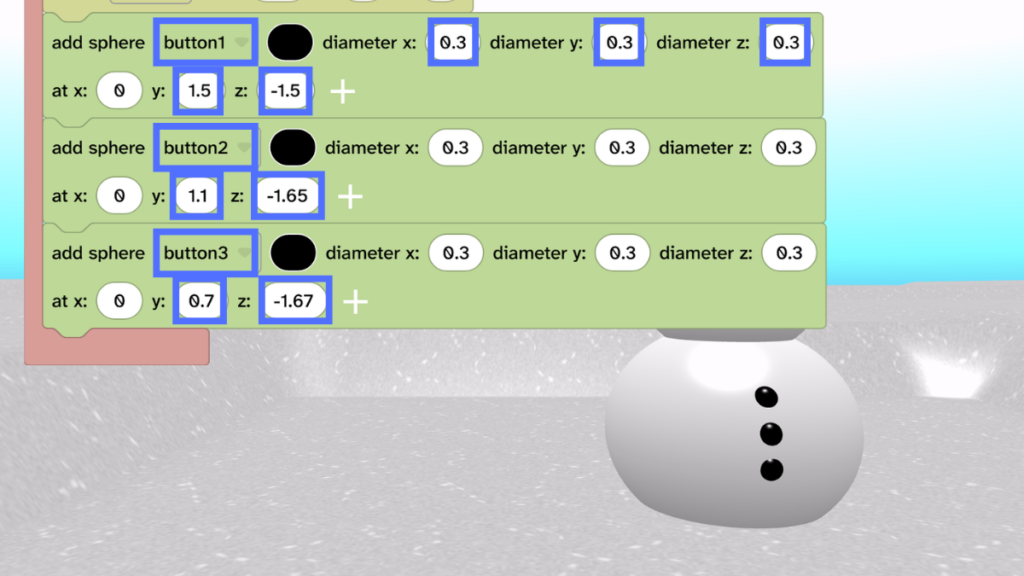
- Add a sphere and name it ‘button1’.
- Change diameter x y and z: 0.3
- Change position y: 1.5 and z: -1.5
- Duplicate button1 and change y: 1.1 and z: -1.65
- Duplicate button2 and change y: 0.7 and z: -1.67
Add a hat
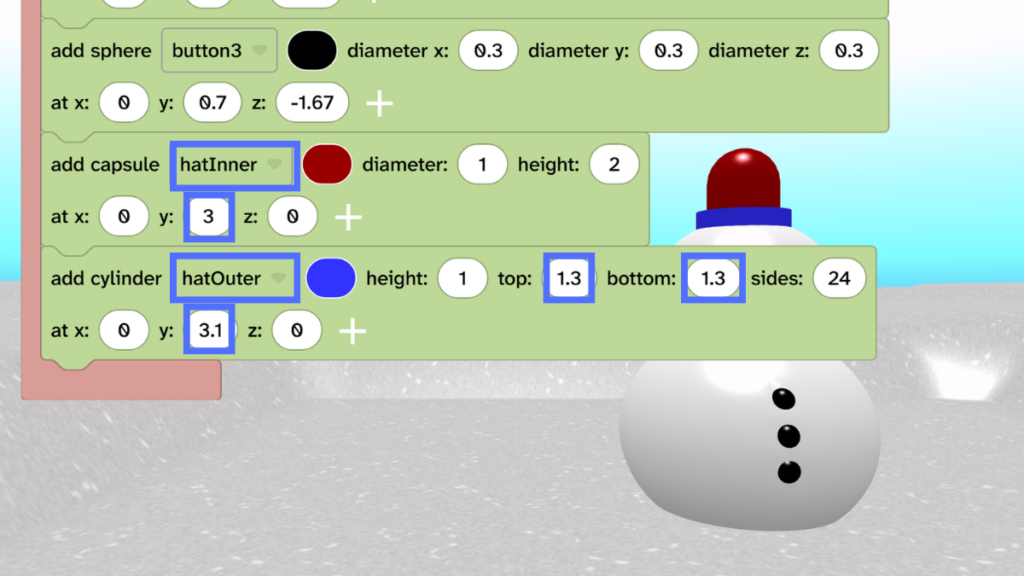
- Add a capsule and name it ‘hatInner’.
- Change the y to 3.
- Add a cylinder and name it ‘hatOuter’.
- Change settings to top: 1.3, bottom: 1.3 and position y: 3.1.
- Choose colours for your inner and outer.
Add arms
- Add a capsule and name it ‘leftArm’. Change the colour to white.
- Change settings diameter: 0.5, height: 1.2, position x: -1.2, y: 0.9 and z: -1.
- From Transform, drag the ‘rotate by’ block underneath the ‘leftArm’.
- Change x: 25, y: 0 and z: -25
- Press Play ▶️ to test. Your left arm should rotate into position.
- Duplicate the left arm and name it ‘rightArm’.
- Change position x: 1.2
- Duplicate the ‘rotate by’ block and change it to ‘rightArm’.
- Change z: 25.
- Press Play ▶️ to test. Your right arm should rotate into position.

Take it further
- Experiment with different shapes for the hat and arms.
- Add items, such as the headphones or star headband to your snowman.
- Add a mouth using lots of spheres.