
Add a sphere head
- From Events, add a ‘start’ block to the code area.
- From Scene, choose Objects and drag the ‘add sphere’ block inside the start.
- Change the diameter x, y, z values to 3.
- Change the y position to 1.
- Change the colour to white or a pale yellow.
- Rename the sphere to ‘head’.

Add the eyes
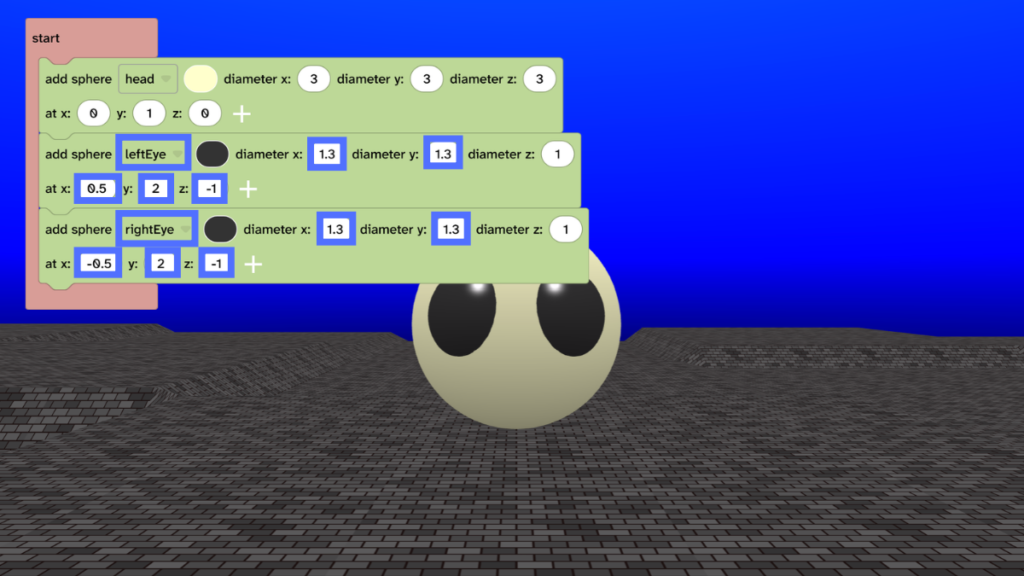
- From Scene, choose Objects and drag the ‘add sphere’ block under your ‘head’ block.
- Rename it to ‘leftEye’.
- Change the diameter x and y values to 1.3.
- Change the position to x: 0.5, y: 2 and z: -1
- Add another sphere and rename it to ‘rightEye’
- Change the diameter x and y values to 1.3.
- Change the position to x: -0.5, y: 2 and z: -1
- Choose either black or dark grey colours for your eyes.
Add the nose
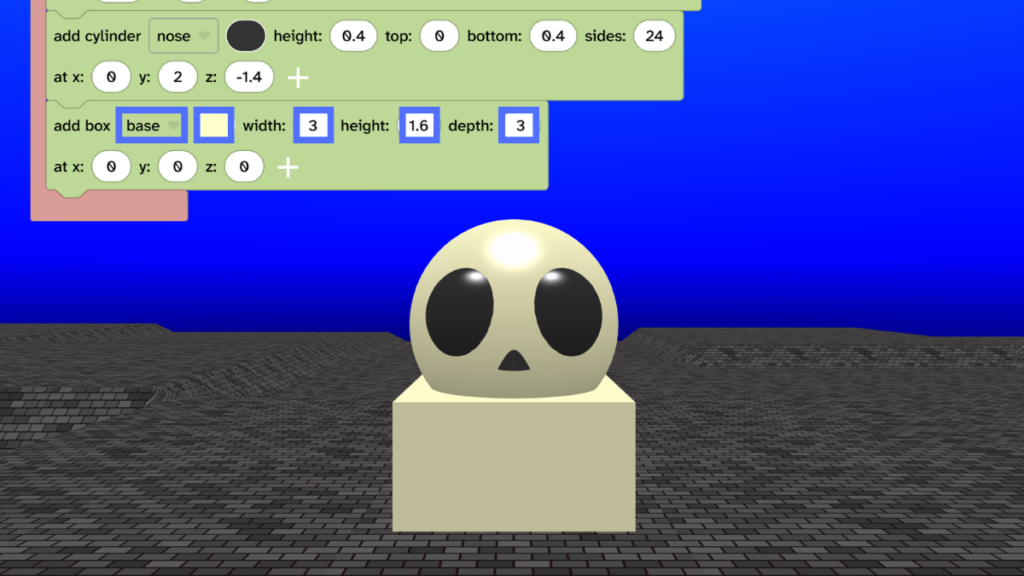
- From Scene, choose Objects and drag the ‘add cylinder’ block under your ‘rightEye’ block.
- Rename it to ‘nose’.
- Change the colour to black or dark grey.
- Change the settings for height: 0.4, top: 0 and bottom: 0.4.
- Change the position to y: 2 and z: -1.4

Make the skull base
- From Scene, choose Objects and drag the ‘add box’ block under your ‘nose’ block.
- Rename it to ‘base’.
- Change the colour to your bone colour.
- Change the settings: width: 3, height: 1.6 and depth: 3
Subtract to form the skull
- From Transform choose Combine and drag the ‘add subtracted’ block under the ‘base’ block.
- Rename ‘subtracted1’ to ‘skull’.
- Change as to ‘head’.
- Press the + sign on the list three times to get four list items.
- From the dropdowns choose ‘leftEye’, ‘rightEye’, ‘nose’ and ‘base’.
- Press Play ▶️ to test. You should see a formed skull with room for teeth.

Add four teeth
- From Scene, choose Objects and drag the ‘add capsule’ block under the ‘add skull’ block.
- Rename it to ‘tooth1’.
- Change the colour to your skull colour.
- Change settings diameter: 0.35 and height: 0.4
- Change position to: x: -0.525, y: 1.3 and z: -1
- Duplicate the tooth and change position of ‘tooth2’ to x: -0.175 and z: -1.1
- Duplicate ‘tooth2’ and change position to x: 0.175
- Duplicate ‘tooth3’ and change position to x: 0.525 and z: -1
- Press Play ▶️ to test. You should see a formed skull with teeth.

Merge and spin!
- From Transform, choose Combine and drag the ‘add merged’ block under the last tooth block.
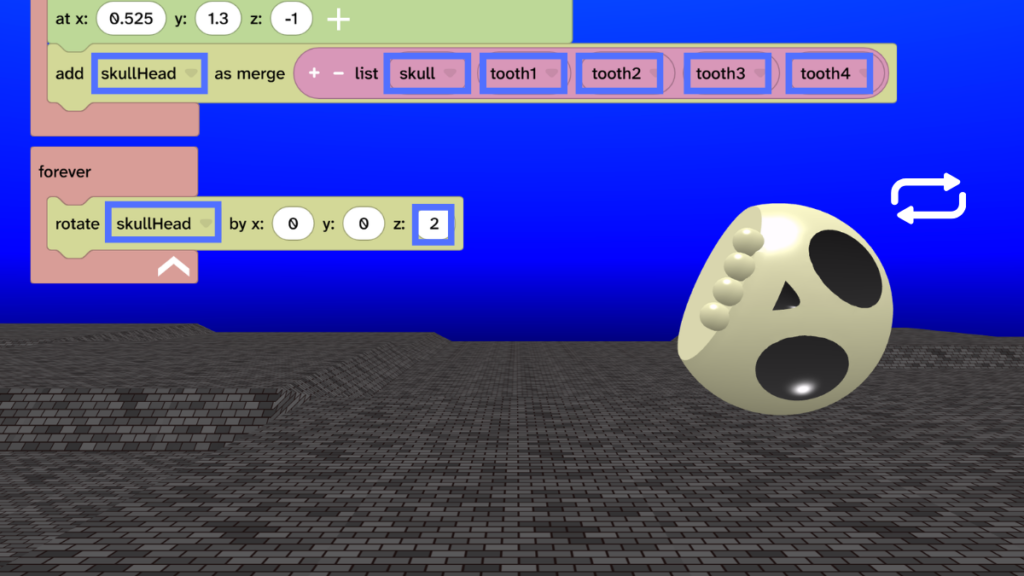
- Rename ‘merged’ to ‘skullHead’ and press the + on the list four times.
- Add ‘skull’, ‘tooth1’, ‘tooth2’, ‘tooth3’ and ‘tooth4’ to the list.
- From Events, drag the ‘forever’ block into the code area.
- From Transform, drag the ‘rotate by’ block inside the ‘forever’.
- Make sure the block says ‘skullHead’.
- Change to z: 2.
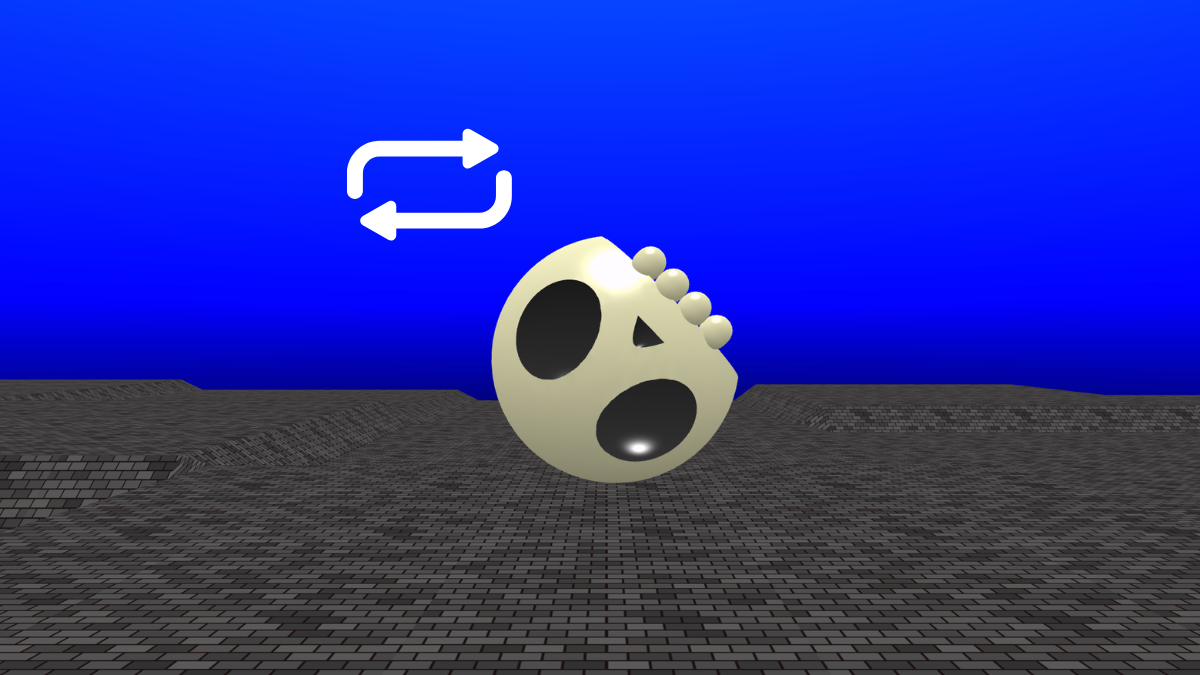
- Press Play ▶️ to test. Your skull will spin around.
- Debug: Did you press play? Make sure that you used the ‘rotate by‘ block and not ‘rotate to‘. Make sure the ‘rotate’ block uses ‘skullHead’.
Take it further
- Try different colours for your skull.
- Spin the skull in a different direction.
- Try a glide animation for the skullHead instead.
Inspired by our community
This project was inspired by a skull head model created by Nicki Cooper, a member of the Flock XR community. They’ve kindly shared their idea so that others can have a go too!